Happy Friday!
Stopping in to share a fun little card with you using another image from our latest release at Sami Stamps!
This card features the Line of Whiskers image:
The first thing I worked on for this card was the fence that they are all perched on. I took a piece of the Essentials by Ellen woodgrain paper and added 2 colors of distress ink - the first layer was Frayed Burlap. I used a lot of pressure with my blending pad to get the ink down into the grain pattern. Then I want over top of that with the Ground Espresso color. This time I used a really light hand so that it just covered the top detail.
I really wanted the light grain pattern to show through, and using two tone ink blending gave me the perfect result for that!
Then I printed out my kitty image and colored it up with my pencils. I just adore Sami's cat images! They always make me smile, and of course I can't resist coloring them up like my sweet kitties :)
I trimmed them out and added foam tape to the back. But before adding them to my card base, I used a diagonal brick stencil and added some yellows to the background, then splattered it with some water to get a bit more detail and texture. After that dried, I adhered the kitties and the fence down.
The clouds were die cut from a Mama Elephant Landscape Trio die and then I simply stamped a fun Newton's Nook sentiment across the top.
Finished the whole thing off with a little twine!!
Be sure to stop by Sami Stamps to check out this adorable release! And you have a few days left to enter our Anything Goes challenge!!
I'd like to enter this card in the following challenges:
Simon Says Stamp-Anything Goes
Word Art Wednesday #232-Anything Goes
Thanks for visiting! <3
read more →
Hello Everyone!!!
I hope you've had a fabulous week! This post is scheduled, but I can guarantee that I have been having a blast spending the week with my sister and smooshing my sweet little niece :)
I'm bringing you another awesome card for the most recent Sami Stamps release, this time featuring the Cute Heart Fairy image:
I made this card for my sister, and since she's already received it, I can share it with you!
I loved this fun little fairy, and had the idea to make her swinging through the clouds. Unfortunately, the way I added the strings, the image wasn't weighted correctly so she just kept flipping over....but I kept the strings attached and just adhered her down to the background. Still looks super cool :)
For the background, I die cut a whole panel of white with one of the borders included in the Mama Elephant Landscape Trio set. Then took a little Tumbled Glass and Mermaid Lagoon distress inks and blended up the bottoms of each cut. Once each stripe was colored the way I wanted them, I adhered them down to a new piece of cardstock, overlapping them just slightly so you couldn't see the cut lines and it was just a smooth seamless cloud background. I love how it turned out! Though it's a little hard to see now that the card is complete...
I cut out a stitched scallop frame with my Silhouette and then added a clear page protector to that cut out to give me a clear front for my shaker window. The shaker is filled with all sorts of sequins and beads and a few heart sequins. Just a whole bunch of happy, and I love that they can get caught in the clouds :)
Once everything was sealed into my shaker, I adhered everything down to my card base, and added a little sentiment banner. I didn't do any extra embellishing because there was so much going on in the window, I figured that was enough detail :)
I hope you all have an absolutely fabulous Valentine's Day!!! I love each and every one of you and your constant comments and support! They always make my day and put a smile on my face!!
Thank you so much for visiting! <3
read more →
Hi Everyone! Happy Friday!!!
I'm excited for this weekend, are you? Matthew has his possible last flag football game on Saturday (unless they win, then their in the playoffs for next week...fingers crossed!) Then on Sunday I get to hang out with my bestest friend in the whole world and be crafty! I'm so excited!
But first, I must share a card with you. Have you ever thought up an idea and started to execute it, not really knowing how it would look in the end, debating it the whole way until that last piece is added and it's so amazing you want to cry? Yeah that happened with this card.
I did some things I don't normally do on a card, second guessing them each time and doubting that they would all work together in the end. But I'm so glad I stuck it out. I can't tell you how happy this card made me when I put everything together. It just...well...kind of takes my breath away :)
Ok, I may have been dramatic...but look at that card! I feel like I got everything right on it for once. I love a lot of the cards that I make...I wouldn't share them if I didn't. But this one...this one takes the cake.
So to start, I took a piece of white cardstock and spritzed it from the side with some Amethyst Heidi Swap shimmer spray. I wanted there to be a concentration on one side and then have it fan out from there, so I also added a lot of larger dots on that left side to build up that idea. Then I cut of scallop border from the Mama Elephant Borderlines Trio set from black and layered that behind my spritzed panel. I also added a thin strip of black glitter paper along that edge.
For my cups, I did a fun watercolor technique onto a half sheet of watercolor paper. First I pressed my distress ink onto my plastic mat...I used Seedless Preserves, Milled Lavender, and Picked Raspberry. I misted all that ink, and then pressed my paper down onto it, swirling it a little to get the color to move. When I pulled it up I had nice coverage on my paper, but wanted more, so I misted the ink a little more and pressed my paper into it again. Then I dried it a little so the ink on the paper wouldn't move so much anymore, and continued to press the paper into the ink left on my mat. This helped give it some speckles and variance in the colors. I also added little drops of black to the puddles of ink on my mat. I didn't want there to be a lot of black, just little dots.
Once that was all dry, I added some water droplets to lighten and remove some of the ink, and also splattered some of the Heidi Swap shimmer inks in the black and amethyst for a little bit of sparkle. Set that aside so it could completely dry and worked on my kitties.
I adore these little kitties. They are so precious and reminded me of Storm and Cloud. Sami always gets it right, I swear! So using my ShinHan markers, I colored them up like my babies. So precious! Oh, the image is the Cup Kitties 4 image from our most recent release at Sami Stamps!
After everything dried, I cut it all apart so I could piece them all together. I did add a little bit of Seedless Preserves around the edges of the bottom cup, and Picked Raspberry around the edges of the top cup, just to help separate them a little.
The final thing I added was this Prayers die cut from Hero Arts and Simon Says Stamp. I just got it in the mail and couldn't wait to break it out! I took some of the Amethyst Heidi Swap shimmer spray and painted it onto some watercolor paper and waited for it to dry. Then die cut it out, along with 2 more in just regular cardstock. I layered all of that together, which gives the die cut some really nice dimension, added it to my card and covered it with glossy accents.
By the end of this card, my fingers were covered in purple and black ink and I had to be really careful to not snudge it all over my kitties. But sometimes getting inky and messy can produce the best product!!
I hope you've enjoyed this sweet little card! Remember we have an awesome Anything Goes challenge running at Sami Stamps so go join in! Just be sure to use a Sami Stamps image :)
I'd like to enter this card into the following challenges:
CAS-ual Fridays #144-Tic Tac Toe (spritzing, coloring, die cutting)
Chocolate, Coffee, Cards #101-Animals
Creative Fingers #95-Anything Goes
Word Art Wednesday #204-Anything Goes
I'm also entering this into the Damsel of Distress' Hop to Stop. This is a great blog hop to help draw attention to Domestic Violence. I encourage you to check it out!
Thanks for visiting! <3
read more →
Happy Friday!
We have an adorable new Sami Stamps release to share with you today! This release, titled Little Angels, is absolutely the sweetest! You won't want to miss it!
I got the chance to play with Little Love Angel for my card:
With such a sweet image, I wanted to try and keep my card colors soft as well. It kind of worked, but some of the papers turned out brighter than I expected...which still works!
I started by using some Stampin Up Sage Shadow and inking up a full background with that color. When I was done, I splattered it with water to get the little faded water drops. I die cut out a fun cloud type border from Mama Elephant's Landscape Trio die set and bordered that along the edge of my image panel.
I kept my coloring simple on my sweet little angel, again going for soft colors..though that green sort of steals the show :)
Of course, I added touches of glitter to all the hearts and the cloud. The sentiment is printed off and framed with Notebook Edge border die from My Favorite Things.
I finished my image off by adding a little pierced frame around the edge for some extra detail, and a few little enamel dots in the corner.
I hope you enjoy this sweet release! Be sure to stop by Sami Stamps to see the rest of the DT's amazing creations. We also are starting a fun new challenge this week--Frame It! So join in the fun!!
I'd like to enter this card into the following challenges:
Crafty Catz #291-Anything Goes
Creative Fingers #91-Anything Goes
Penny's Paper Crafty #243-Use A Sentiment
Simon Says Stamp-Make It Colorful
Thanks for visiting! <3
read more →
Hello hello!
It's my day to post over at Meljen's Designs! If I haven't said it before, I just love being a part of this team! The ladies there are just amazing, and the images Melissa draws up melt my heart every time. It actually makes it a little difficult to decide what image to use for my challenge and DT day cards. I usually run through about 4 or 5 card ideas before finally settling on one to work up.
That was totally the case with this card. I had so many ideas in my head that I didn't get this one finished until late last night because it took me so long to decide what to do! Lol...but it turned out perfect!
The only thing I'm not happy with is the fact that the watercolor paper isn't white...I love the Strathmore watercolor paper...but the slightly off/cream color that it has is a struggle for me because I like having bright whites on my cards. I usually try to cover it all up with another color if I'm going to have patterned papers on the card, but it didn't really work out for this card.
I started this card by die cutting the striped panel in the background with the Falling Hearts Die from Simon Says Stamp. I got this for Christmas and absolutely love it!! I lined that sheet with some black cardstock so the hearts would pop out a bit from the busy colored stripes.
Printed off the XOXO Stitches image and colored it in with some watercolor pencils. I used my wink of stella glitter brush pen (refilled with water) and spread the watercolor around to give a nice shaded look. The whole thing is so sparkly! I love it! I did use a really soft pink around the whole outside of the image to try and cover up the cream paper, but it was so light that it just kind of got lost back there...
To decorate the card, I added a few scallops cut with my Borderlines Trio die from Mama Elephant. I cut out a little notch in the top corner and added a little scallop oval and a button, and then finished everything off with some black and white twine.
I had planned on this card being more masculine, but it's not really.. Just a perfect card for Valentine's Day :)
I'd like to enter this card into the following challenges:
Send a Smile 4 Kids-Valentine's/Love
Simon Says Stamp-Something New
SugarPea Designs Sketch 18
The Crazy Challenge #188-Buttons
Thanks for stopping by!! Have a fabulous day! <3
read more →
Hey Everyone!
I've had an incredibly productive day today and figured I'd share what I've made. So there are 2 cards in this post again :)
Lately I've been in a little bit of a crafty rut and I've been trying to figure out why. One of the things that keeps popping into my mind is the fact that I've used all the stamps that I have so many times that the creative ideas for them seem to be all gone...so I have been trying to challenge myself to see if I can come up with new ways to use them until I can get some money together to buy new stuff :)
This is a super cute card that worked out so perfectly for this "stretching" of my stamps:
How cute is that! I combined 2 stamp sets to make this little sweetie: In My Heart from Mama Elephant and Critters in Costume from Lawn Fawn.
I first stamped the pumpkin from the Lawn Fawn set, masking off the little rabbit inside. Then masked the pumpkin and stamped this cute little girl so she's popping up out of the pumpkin! I love it!! The little witches hat is from the cat in the Lawn Fawn set.
The circle around her is all one layer, but I cut out part of the circle up to where the banner is and put some dimension tape on the back so it stamps up. Then I did some inking with my distress inks. I silver embossed a few stars in the sky from the Hero Arts Shoot for the Moon set and added the fun Boo sentiment on vellum from the Lawn Fawn set. I love how this turned out and really got me excited to use my stamps in more creative ways.
I'd like to enter this pumpkin cutie into the following challenges:
2 Cute Ink #116-Halloween
A Blog Named Hero #53-Stretch Your Stamps
Delightful Challenge-Delightfully Frightful
Mama Elephant & Me-Anything Goes
The Challenge #16
This next card was a little frustrating but so worth all the fuss:
For this card, I used a Simon Says Stamp set called Flower Friend. It's a great set full of adorable little flower stamps, but I've used those flower stamps so many times...I needed a change. So I took the cute little scallop border in the set and bent it around into a circle...several times because it kept popping back off my block.. The stamp was actually a little too short for the size flower I wanted, so I just stamped a few of the scallops by themselves to finish the circle.
So awesome! I used some outline and solid circles from the Lots of Dots set to fill in the centers.
Then stamped and white heat embossed my sentiment onto vellum. The sentiment is from the Winnie & Walter set The Big The Bold & The Happy. I love this set because even though it doesn't always have the words I want to use, I can always find ways to piece them together to work. Like the word "you're"...that isn't in the set, but I was able to mask off around an "r" and an "e" to get the word. I love that!
I'd like to enter this flower card into the following challenges:
Fusion Card Challenge

MilkCoffee-Lots of Layers
Winnie & Walter-Unexpected Stamping
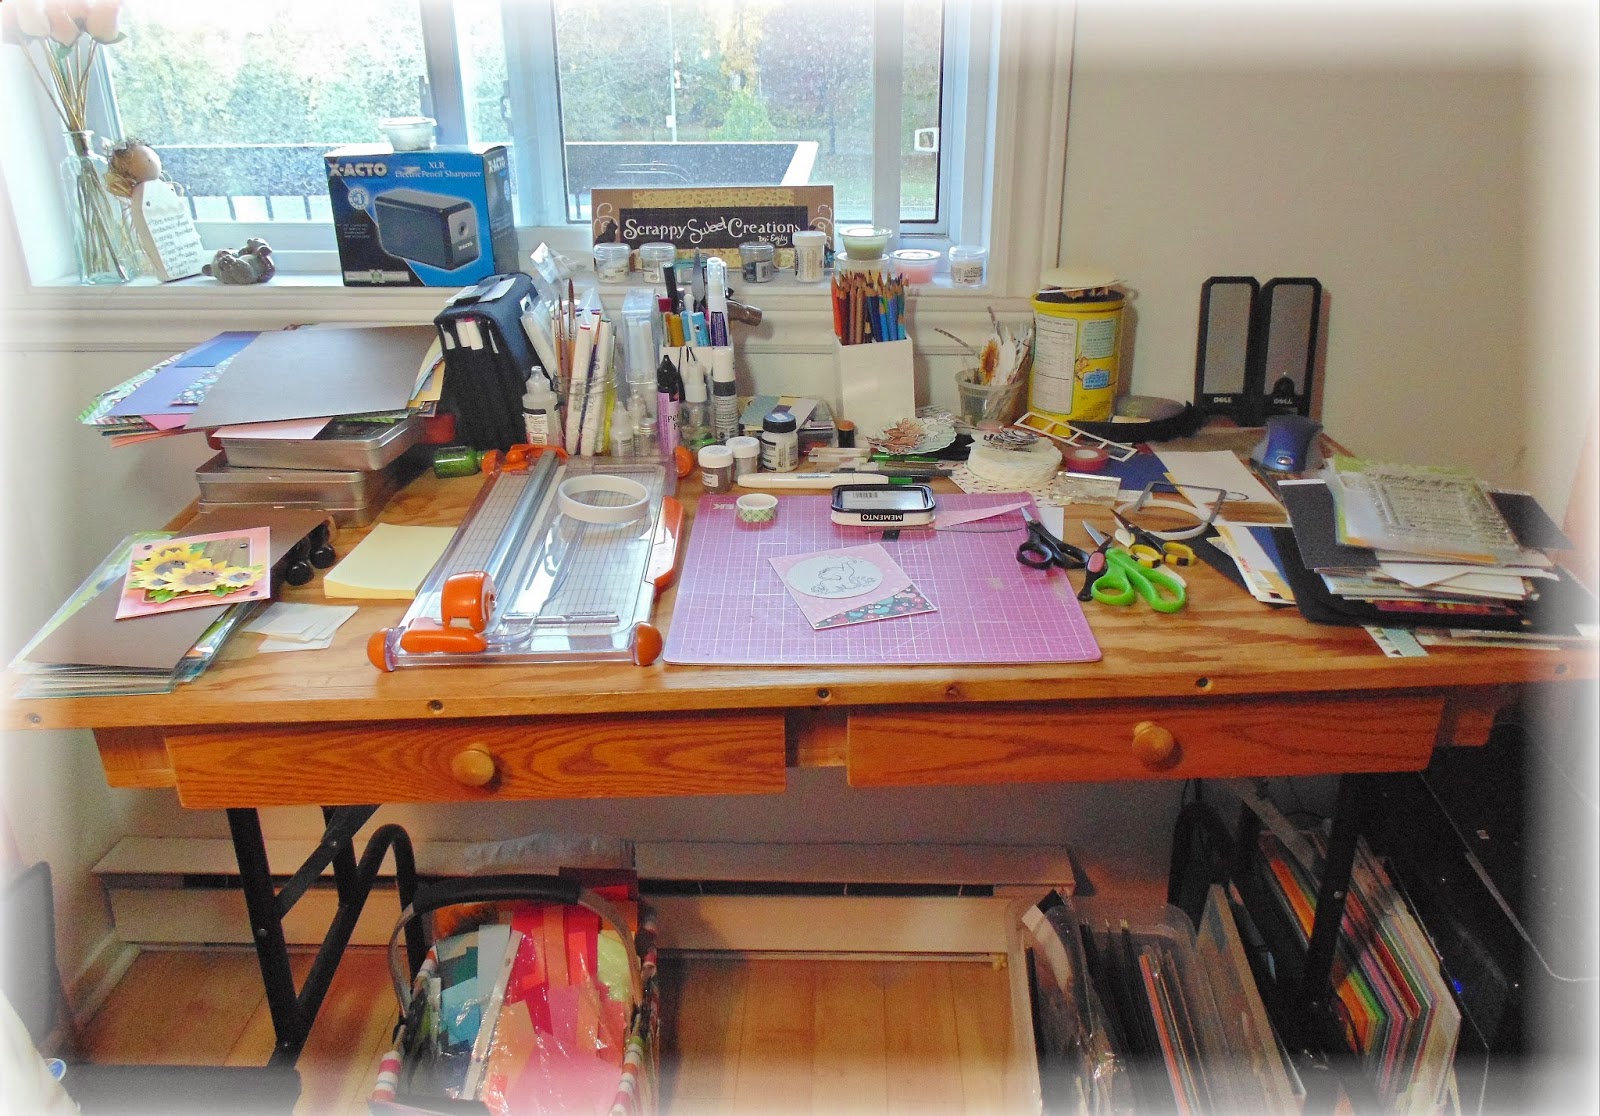
While I was taking these pics, I turned to my desk and snapped a pic for the Winnie & Walter Craftie challenge. This is how I left it...there are about 4 projects in the works on that desk and it's quite messy...
This is just my work desk. To the left I have my ribbon shelf and a huge cabinet that holds a lot of my supplies, and to the right is my computer, paper, and Silhouette.
So thanks for sticking around to read this whole post! A bit long but I really wanted to share these :) <3
read more →
Hey everyone!
Happy Tuesday!
We have a fun new Anything Goes challenge starting today at Tuesday Throwdown! And we have an amazing sponsor - Freckled Fawn!! They were so incredibly generous to send our design team a little goodie bag of materials to use on our cards! This was so much fun!
So this card is actually my second attempt to make something. The first one I had done weeks ago, but it just wasn't working for me...so I decided to try again.
I just love the little patterned acetate sheets they sent us! And I discovered that those cute sheets have a protective film over them...learned that with the first card (cuz you know...I sewed the panels down and then realized there was the protective film..oops :) ) I made sure to remove it for this card before adhering the sweet heart panels to their frames :)
The Daylily image is from DigiStamps4Joy, which I have used my watercolor paints on. The colors turned out a bit darker than I wanted...mostly because the printer ink bled pretty bad with the water...but overall I think it still turned out gorgeous.
For the sentiments, I used part of a stamp from Mama Elephants In My Heart set, and the big Happy is from Winnie & Walters The Big The Bold & The Happy, which I embossed with some sparkly embossing powder.
A few simple rhinestones in the corner and the card was done!
My plan was to follow the sketch at Seize the Sketch this week...I veered a little...but hopefully you can still tell where I got the inspiration from :)
Thanks for visiting!! <3
read more →
I can't believe that I'm already at 400 blog posts! That's a lot of cards! Lol :)
Thank you so much to all of you that have made these last few years of blogging so wonderful! I love and appreciate your super sweet comments, and that you take a little time out of your day to visit my small blog. You mean the world to me!!
So you've probably seen a lot of this type of card around lately (see Kristina, and Dawn's cards! And Jennifer just posted one too!). I've loved them so much, I decided to try it out myself, with a little twist.
I love the galaxy look. There is something so peaceful about space. It's mystery and beauty. While I don't think my card is totally accurate in capturing that beauty, I still love it!
Over the past few weeks I have been working to finally collect all the mini distress ink pads (and can I say that I have totally fallen in love with them!). I had wanted to try doing the galaxy with my distress paints, but just never got around to being that messy. And I'm a little chicken to try the watercolor style yet...but that one's coming, I can feel it! So I decided to try it with the distress inks.
I took a couple of the mini blending tools and splotched some of the colors onto my watercolor paper. Then covered it very generously with the black. I gave it a few squirts of water to get the inks moving and mixing a bit, then dried it with my heat gun. The black wasn't quite deep enough for me, and some of the fun color spots had faded out. So I reapplied some of the colors to intensify them and added more depth with the black. Light misting again and set it aside to dry.
I LOVE it!!! Oh, forgot to tell you. Before I did any inking, I heat embossed the Starry Backdrop from Lawn Fawn over the whole panel. Now that it's done, I think I might have chosen to do that more sparingly, a little more sporadically around the card instead of the whole card front..but I still love it so much!
While the stars are all amazing, I wanted some smaller flecks as well. So I pulled out my watercolor paints and did some shimmery white splatters around the card to get the tiny white star dots. Perfect!!!
To finish it all off, I grabbed the In My Heart stamp set from Mama Elephant and used one of the oh-so-fitting sentiments. I stamped it with the distress ink, and because it stays wet for awhile, I was able to cover it in clear embossing powder and emboss it!! The final touch was some die cut silver sparkly stars.
I can see myself making a ton of these cards! It was so incredibly fun and I love, love, love the end result!!
I'd like to enter this card into the Lawnscaping texture challenge.
Thanks for stopping by!
read more →
Hello!
I want to say a quick welcome to my new followers! I'm so thrilled that you are here! Thank you so much!
We have a new challenge starting for you today at Meljen's Designs and it's Splat! We want to see you use your ink, paints, and mists!
I have been addicted to my paints lately, and having just bought the awesome Gansai Tambi watercolor set from my local craft store, my obsession grew quite a bit more. So this challenge was super fun for me!
It's a bit different of a card than my normal style...but I really love it! I was also able to use up another couple of scraps for this card, which is always exciting :)
That gorgeous butterfly (Fancy Butterfly), yeah that was one of my failed attempts for the "cardstock only" challenge at Meljen's a few weeks ago. It was too pretty all colored for me to throw it out, but it really didn't work on the card I was attempting. But it fit perfectly for this one!
I started by mixing up some embossing paste with 3 different shades of pink ink from Stampin Up. Then swiped them over a checkerboard stencil I cut out with my Silhouette so that they formed an ombre pattern. Looks so cool!
I took a thin scrap of paper and embossed it with some gold embossing powder, then trimmed it down into 3 stripes. They were going to all be the same size, but my measuring was off and they all ended up different sizes, but it totally worked!
Now for the fun part, which is always something I struggle with...the paint splatters! It seems no matter how hard I try, I can never get the really good large splats of color down on my paper. They are always super small little flecks...so I added a few larger ones myself.
Any tips on how to get larger drops? I tried adding a bunch of water to my brush...but that didn't help either.
I covered a couple of the drips with glossy accents so they stood out a little more. The vellum panel is cut with the Landscape Trio from Mama Elephant. Absolutely love that those can be used for so much more than just landscapes! It made the perfect wonky rectangle to go behind my butterfly!
The finishing touches were some wire antenna for the butterfly and a simple embossed greeting flag. All done! I so so love this card!!
Stop by Meljen's Designs to see the rest of the DT's creations, and then join in the super fun challenge!!
I'd like to enter this card into the following challenges:
Addicted to CAS #44-Gold
A Gem of a Challenge #125-Embossing
Crafting When We Can #75-Bright Colors
Sketch Saturday #322
Thanks for visiting! <3
read more →
Hey everyone!
Happy Wednesday!! We are finally getting some cooler weather here in Montreal, which is such a relief! I'm not a fan of heat, but I was thankful that the humidity stayed away for most of it. Now it's rain, which is always refreshing :)
For my birthday a few weeks ago, I decided to buy myself a little gift...some goodies from Mama Elephant that I've had my eyes on for quite awhile. Believe me...it was hard only picking a few! I have a whole entire wish list for Mama Elephant, but I had a budget to stick to so only a few things made it into my basket. But since receiving them, I haven't been able to stop playing! They haven't even made it to a proper storage place yet because I'm always grabbing for them! That's how you know you love something :)
Of course, that pile of things-I-can't-stop-reaching-for has gotten pretty large...but oh well!
See!! So incredibly adorable! Since the challenge over at Mama Elephant right now is watercolor birthday, and I'm addicted to watercolor, I decided to join in! The background is actually a watercolor piece that I did quite awhile ago and never found a proper home for it, but it was too pretty to throw out. It was a test piece really. I was trying to do a fun background where you apply paint to an embossing folder, mist it a few times and then press your watercolor paper onto it. The paint should transfer to your paper and leave the embossing pattern empty. Well, I learned that too small of a pattern doesn't really work. This piece, I was trying to use the Swiss Dots folder...but those dots are just too small and all the paint smooshed into them. There were just a few that showed up in one of the corners and if you look really really hard, you can see them in the upper left corner under the vellum.
But like I said, even without the pattern, the colors looked so pretty that I couldn't throw it out. But it worked perfect for this card!
One of my fun birthday goodies was the adorable In My Heart stamp set from Mama Elephant. Love these little cuties! And it has all the perfect "miss you" sentiments on it, which is something I was telling Matthew a little while ago that I really needed. I've colored the cute little girls in with my ShinHan markers and then trimmed them all out.
And see all those stitched hills? Yup! My second little gift, the Landscape Trio! I used the fun cloud die to make little shrub mounds in the background. Looks pretty cool to me :)
The balloons are stamped from the Lawn Fawn Hello Sunshine set. I had do to a little watercoloring on them to get the shading to blend properly, because trying to wipe off some color and stamp it just wasn't working very well for me. I added a black border around them and glued some strings so the little girl could be holding big bundles of balloons.
The sentiment is from Winnie & Walter's The Big, The Bold & The Happy. It was supposed to be more of a silver color, but I picked the wrong embossing powder the first time, so had to go over it again with the right one and I think that muted down the color a bit. But it still looks awesome :)
A few little flowers and turtles, and some glitter to the balloons and the card was done! So cute and so fun!
Hope you made it through all those rambling details :)
I'd like to enter this card into the following challenges:
Card Mania #53-Birthday Party
Little Tangles #42-Happy Birthday
Mama Elephant & Me-Watercolor + Birthday
Paper Shelter #169-Punches/Dies
Winnie & Walter-Join in to Win
Work it Wednesday-Blue
Thanks for stopping by! <3
read more →