Love and Prayers

Happy Thursday!  Only one more day till the long weekend!! Woot!  I love when my husband gets to stay home with me :)

I've tried to really hit my work hard today and bust out some cards.  They have all turned out fabulous but I really wanted to share this one with you :)
I recently won this wonderful image from Paper Makeup called Emma.  It's so precious!  The card is themed for the Link up for Pink challenge blog.  That is why there is so much pink!  Although, I do have to admit that lately pink seems to be my color choice when it comes to cards...not really sure why.  I like the softness of it I guess.  And I have a lot of soft pink papers :)

Anyway, this card came together pretty darn easy :)  That always makes me happy!  I pulled some bolder pink papers from my stash that I have had forever and trimmed them to size, distressing the edges (recently figured out how to do that (yes I'm slow) and I'm loving it!).  I punched out the heart border just wide enough for my scroll ribbon and added that behind the image.

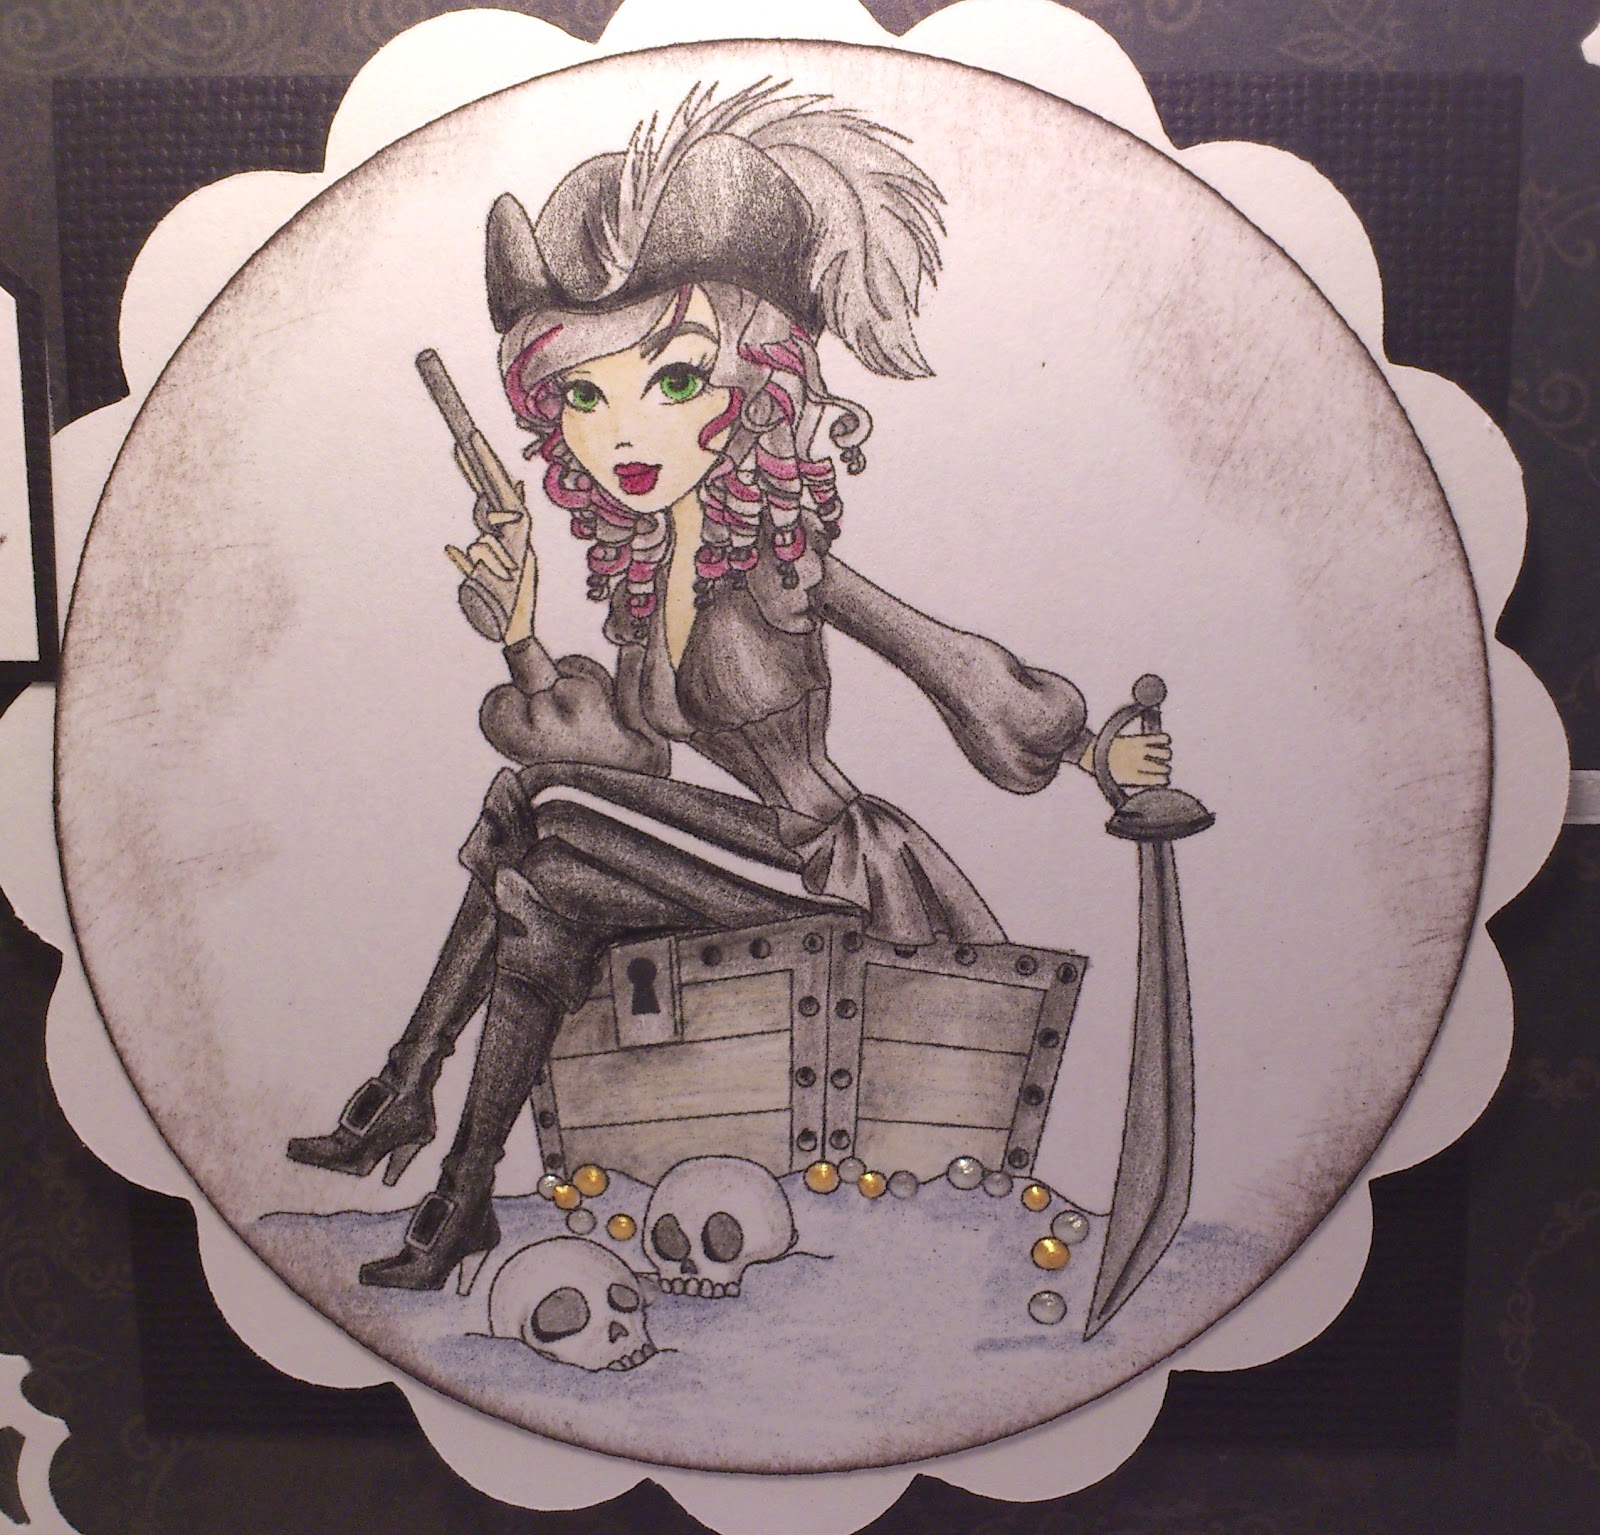
Miss Emma is colored with my colored pencils.  I outlined her with my light blue Copics sketch marker, then added light blue and white paint dots around the umbrella, sort of to mimic water.
I used the punched out hearts from the border, layered a few together, covered them in glitter and then added them to the corner.  While everything was drying, I made up the pink flower and put a light purple pearl in the center.  The white roses I had quilled up already...which is very rare :)

The sentiment is just printed from my computer, mounted onto pink card stock and scallop cut around the edge.  Gorgeous :)

This card is entered in the following challenges:
    Link up for Pink #5
    Love to Create #30-Handmade Flowers
    My Craft Spot #67-Hope is Rising
    Totally Stampalicious-Anything Goes
    Bearly Mine #50-Anything That Glitters
    My Mum's Craft Shop #72-All the Threes (3 heart embellishments, 3 flowers)
    The Paper Shelter #79-Layers on Layers
    The Poodles Parlour-Winged Things
    Come and Get it-Show us Your Flowers
    Stamptacular Sunday #178-Roses and Ribbon

Thanks for stopping by!

17 Fabulous Comments:

Broom Rides and Weddings!

Hello everyone!  Happy Tuesday!
It's been a slow couple of days for me...kind of lost my motivation to do anything and it's been a struggle to get it back...but I'm trying!

I have 2 cards to share with you today.
This first one I made up for our cousin who is getting married this weekend.  Unfortunately we can't make it to the wedding...but we are so happy for them and wish them well!
I love the way this card turned out!  I was a little scared doing a square card...not my style...yet :)  I have a hard time with scaling for something other than an A2 sized card...but I think it's adorable!
The image is Love Birds from Meljen's Designs, colored with my pencils.
The hearted heart in the back is a cut from Birds Cards that I covered in glossy accents and smothered with glitter :)  Had to have some sparkle on this card!!

While the heart was drying, I made up a couple of white roses.  All the layers are cut with my cricut machine.  I like the way they turned out, though I need to play with the petal sizing so that there isn't a drastic change from one layer to the next.  Can't see it too much in the photo but I noticed it a lot while putting them together and it just bugged me :)
I finished off the card with a layered bow, a printed sentiment from Create with TLC and some pearls in the corners!

This card is entered in the following challenges:
    Forever Friends #43-Anything Goes
    Love to Create #30-Handmade Flowers
    My Mum's Craft Shop #71-Wedding/Anniversary
    Little Scrap Pieces-Make it Sparkle
    Digi Design-Wedding, Anniversary, Engagement

My next card goes back to Halloween...of course!  What isn't to love about Halloween?
Love it!!  This is Fly Girl from Saturated Canary.  She's just a doll!  I am loving the witch images from SC!  They are the focus of many of my Halloween cards so far this year :)
I seem to be hooked on cutting out my SC images, and making layered bows lately.  Those bows are awesome, and I'm getting the hang of how to make them, but they also add so much punch to a card!  How cool to add multiple colored ribbon instead of just one color! Awesome!
 So I colored my image in with my pencils and added some small glitter dots to her clothes and the broom.  Then I made a little sky scene with clouds and a moon cut with my cricut.  I used my chalks and really detailed out the clouds.  I had to practice a little before hand to make sure I knew what I was doing :)  I love the way they turned out!
Then I cut a few bats and inked them in black, and added a printed sentiment tag.
Pretty simple, but so cute!

This card is entered in the following challenges:
    There She Goes #171-Sketch
    Divas by Design #49-Anything Goes
    Tammy's Scrapin Corner #25-Lots of Layers

Thanks for stopping by!  I'd be so thankful if you would swing over and "Like" my Facebook fan page!!

10 Fabulous Comments:

Catching Butterflies

I hope everyone is having a great Wednesday!
Mine has been full of canning peaches and crafting :)
I'm very happy with how this card turned out!  I used the new Saturated Canary image Catching Butterflies.  She's so cute!! I used the inspirational photo at the Saturated Canary challenge blog to get my mojo going on this one, and followed the sketch at Graphicat Sketches.  The inspirational pic is of a super cute bike in front of a tree...but I didn't have any tree images so I went with a garden fence.  That image is Picket Fence from The Stamping Boutique.

Once the images were printed off, I used the fence as my background and cut it into a circle.  The I trimmed around miss butterfly and mounted her in front of the fence.  I think it makes a cute scene :)

Then I set to making my rose and rose buds.  I cut out all the layers with my cricut and then layered them together.  I added some clear stickles to the edges so it sparkled.  I added a floral ribbon behind the image and made a layered bow for added detail.  Then I made a couple stick pins by gluing on some butterfly gems to the end and then gluing them into my bow.
It's such a cute card!  While I like the pink and yellow together, I think I want to try it in a different color combo...probably blues since that's my favorite color :)

This card is entered in the following challenges:
    Saturated Canary #24-Photo Inspiration
    Graphicat Sketches #14
    Craft Your Passion #124-Power of 3 (3 rose buds, 3 ribbons)
    Tammy's Scrapin Corner #24-Anything Goes
    Timeless Tuesday #183-Butterflies, Bees, Spiders, Oh My!
    Ruby's Rainbow #35-Butterflies
    Clearly iStamp #58-Circles
    Stamptacular Sunday #176-Let Hear it for the Girls

Thanks for stopping by!
   

10 Fabulous Comments:

Life is Amazing

Happy Tuesday!
Today starts a new challenge week at Tuesday Throwdown!  This weeks challenge is "Hip to be Square" so we want to see lots and lots of squares on your cards!  Not too difficult, right?
Here is my card:
Our fabulous sponsor this week is The Stamping Boutique (who is currently having a sale!!  Woot!)  So many wonderful images from them :)
I have used Tulip Fairy.  It's an image I won quite awhile ago and I thought it would work perfect for this challenge.
She's colored in with my colored pencils and I added a little glitter to her wings and some of the details around the image.
I cut some patterned paper into squares and alternated them behind the image.  Then I punched out a heart border on the top and bottom of those squares.
The sentiment is from Ginger's House.  The final touch was making some square buttons to embellish the card with.

This card is entered in the following challenges:
    Sketch Saturday #221
    The Crazy Challenge #127-Anything Goes
    Frosted Designs-Twine or Ribbon
    The Corrosive Challenge #156-Cute as a Button

Thanks for stopping by!  Be sure to swing over to Tuesday Throwdown, check out the Design Teams amazing work and join in our challenge!!!

15 Fabulous Comments:

Pumpkin Patch

Happy Sunday!
I hope you have had a fabulous weekend!  I've stayed busy but also found time to relax :)  I got to snuggle in bed for awhile this morning with my hubby and our kitties!  So cozy! :)

I've been working on this card for a few days now...mostly because I kept getting distracted doing other things around the house, or for my Etsy shop...but I finally finished it and it is so fabulous!
I used the sketch at Tuesday Morning Sketches...I was a little skeptical about it at first...wasn't sure if I could pull it off.  But the more I looked at the DT's inspiration, the more I mulled it over and sketched it out, things finally started the form in my mind.
I wanted to stick to the fall/Halloween type of card style, but lighten it up and not have it be so creepy and dark.  I found a few patterned papers in my stash/scraps that matched what I wanted to do, and set to work.
The frame behind the image is cut from the cricut Lacy Labels cartridge.  I embossed the solid blue frame with the Swiss Dots folder and then embossed the patterned paper with the D'vine Swirls folder.  It adds great dimension and character behind the image.

Of course, Miss Cinders is from none other than Saturated Canary!  I remember as a child always watching the Disney movies...mostly Beauty and the Beast, but Cinderella was always in the mix and I LOVE Krista's interpretation of her :)
I kept the coloring on her simple with teal streaked through her dress and blondish colored hair.  I added some of my new Star Dust Stickles to her shoes, dress hem, sash, and hair bow.
The flowers are files cut with my cricut, inked around the edges, and layered together with a pearl in the center.  I matched the orange on the smaller flowers to the orange used in the circle die cut above the image to pull that color throughout the card.
Then I just added the ribbon and bow, printed off the sentiment and scallop cut around the edge!
So cute!  I just love it!

This card is entered in the following challenges:
    Tuesday Morning Sketches #159
    The Pretty Little Ribbon #13-Add Some Bling and Sparkle
    V's Sweet Ideas #2-Use a Digi
    Critter Sketch #128-Use a Digi
    Love to Create #28-Sparkle
    Tammy's Scrapin Corner #23-Add Some Flowers
    Whimsy Stamps #50-Lots of Layers
    Chocolate, Coffee & Cards #19-Emboss It

Thanks for stopping by!

13 Fabulous Comments:

Pirate Penny

Wanted to share a quick little card that I just finished up :)
Not a whole lot of detail on this card.  I used the Sassy Studio Design image Pirate Penny.  I won her awhile ago, fell in love with her and then never got around to putting her on a card!  Seems I do that a lot :)
I did everything in black and white with just a few minor touches of color.  Her hair has some streaks of maroon, and there are gold/silver coins around the chest.
I cut out a couple layers of a skull with my cricut, covered them in glossy accents and then layered on the glitter.  It makes such a great embellishment :)
While I love my A2 sized cards...sometimes I feel like I don't have enough room to add everything I want, or make my image large enough to really add in the details...but I'm not sure I'm ready to try making larger cards...something I'll have to think about :)

This card is entered in the following challenges:
    Sassy Studio Designs #137-Sketch
    Love to Create #28-Sparkle
    The Paper Shelter #77-Clean and Simple
    Friday Mashup #71-Black and White with Bling
    Sentimental Sundays #115-Clean and Simple
    Robyn's Fetish #120-Monochromatic

Thanks for stopping by!


9 Fabulous Comments:

Tripping You

Happy Wednesday!
I've been pretty busy this week opening my Etsy shop back up and getting things posted there, but I have still made time to make a few cards.
I recently won a challenge over at GraphiCats and received her whole line of new released sentiments!  I am super excited to use them, but as I was scanning through the other sentiment digi's there, I came across one that I just loved and had to purchase!  And I knew just the image to use it with :)
Of course it's Saturated Canary!  I can't seem to make any card without one of those eye catching images on it :)  This is Zombie Niamh.  I was a little sketchy at purchasing this image in the beginning, but the more I looked at it, the more I loved it!  And Krista has a new zombie image coming out soon that is even cuter!  Gosh...

So I colored Miss Zombie with my pencils.  I'm not sure I really like how it turned out...guess coloring zombies is a little harder than I thought :)  The red sort of got away from me in a few spots...I wanted her to sort of be cutesie with a little edge, she is a zombie after all.
I cut out the frame from the Lacy Labels cartridge and added some black dots with glitter on top to the points.
The sentiment reads "You're a great friend, but if the zombies are chasing us I'm tripping you!"  Love It!!  I cut it into a tag and added a green safety pin to the top.
I love the green and black color combination.  Seems to be perfect for a zombie card :)

This card is entered in the following challenges:
    Sketch Saturday #220
    The Crazy Challenge #126-Black/White + 1
    Critter Sketch #128-Use a Digi
    Kaboodle Doodles #132-All About Friendship
    Paper Makeup #49-3-2-1 Recipe (3 Flags, 2 Ribbons, 1 Image)
    Paper Pretties #52-Anything Goes
    Paper Crafting Journey-Anything Goes
    One Stitch at a Time #126-Anything Goes

Thanks for stopping by!!!


16 Fabulous Comments:

Friends Forever

Quick little post before heading off to bed!
I finally finished this card after working on it all afternoon!  It was totally worth it though cuz I just love how it turned out!
Gorgeous right!?  I know it doesn't look all that complicated...but most of my time is spent figuring out the flowers I want to use, making the cut files, waiting for things to dry...everything I put on my cards is handmade and I'm usually making it as I'm constructing my card.  I think that's what makes my cards so special :)

For this card I used Parade from Saturated Canary.  Such a cute image!  And again, can be used with so many themes!  I chose friends and went all girly on this card.  I love the combination of pink and gray...they just seem to go really well together.  So I kept the tones light throughout the whole card.  Colored the image with my pencils and grounded her, along with chalking some blue in the sky.
Like I said, I make all my embellishments, so I cut out and glued together all the flowers and punched out a bunch of foliage.  Oh I used a heart border punch on the side panel and topped it with a white scalloped ribbon.  Then the smaller gray panel on that is embossed with the Swiss Dots folder :)
I cut out a few butterflies, chalked the 2 smaller ones and glittered the large one.  All the flowers and the 2 small butterflies have pink or clear gems added to them, and the large butterfly has a big pink bead in the middle.

I made up a couple of small pink buttons and added the sentiment flags to the open space on the image.

It turned out exactly as I wanted it to!  That doesn't always happen, but when it does, I love it!

This card is entered in the following challenges:
    Saturated Canary #23-The Great Outdoors
    Seems a Little Sketchy #19
    Daisy Doodles #65-Outdoors
    Lexi's Creations #71-Sparkle and Shine
    Tammy's Scrapin Corner #22-Show us Your Bling
    Bearly Mine-Sparkle and Shine
    Ladybug Crafts-Summer Fun
    Divas by Design #47-For a Female
    The Paper Shelter #76-Going Round and Round
    Stampavie and More #174-Buttons and Bows
    Whimsy Stamps #49-Summer Fun
    Chocolate, Coffee & Cards #19-Emboss
    Clearly iStamp #57-Things with Wings
    Send a Smile 4 Kids-For the Girls

Thanks for stopping by!

16 Fabulous Comments:

Meljen's Designs...So Cute!

TGIF!!
I hope everyone is having a fabulous Friday!  It's been pretty quiet for me.  I was able to finish up a few cards that I started yesterday, even with it being our Anniversary (see post here).
It seems lately I have been obsessed with using images from Meljen's Designs.  I bought a bunch of her images recently with a 50% off sale she just had, and they are just so darn cute!  So many ideas run through my head as I scan the images that I just can't help but make a few cards with them :)
This is my first card.  I am in such a Halloween/Fall kick right now!  Maybe I'm just done with this heat and humidity and I'm ready for cooler weather :)  So a lot of what I have been working on has centered around fall and Halloween...which honestly is okay with me since it is my favorite season.
For this card, I followed the sketch at Mojo Monday.  Such a fun sketch!  While we were in MI I bought a large DCWV fall paper pack from JoAnn's, so that is where all these papers are from.  The image is Cat O Lantern from Meljen's Designs.  I've colored it in with my colored pencils.  I also printed off the Cute Corner Spider, cut around the edges and stuck him in the corner.  I thought that was a fun addition to the card :)

The sentiment is printed on my computer and then flagged and tucked behind the image.  I cut the scallop frame from my Lacy Labels cartridge, and then cut the image out with my Spellbinders Oval.  Added a ribbon and bow, and some silver glitter to the web and image to finish everything off!

This card is entered in the following challenges:
    Mojo Monday Sketch #253
    Love to Create #27-Punches and Dies
    Paper Pretties #51-Use Scallops
    Sentimental Sundays #114-Fall
    Craft Your Passion #122-Anything Goes
    Deep Ocean #31-Anything Goes

This next card is not fall, but still Meljens :)
I have had this blue paper in my stash forever!  It was one of those papers I grabbed because it caught my eye, and I love blue...but it's so bold that I shy away from it when I'm looking for papers to use.  But when this card idea popped into my head, and I passed this paper while thumbing through my stash I knew it would be perfect!  And it matched perfect with the red dotted paper!

The image is I Love You This Much from Meljen's, colored with pencils and mounted on a frame cut from Lacy Labels.  I inked around the image frame so that it stood out a little, since it has a white frame...I wanted there to be a distinction between the image and it's frame.

I used my heart border punch at the bottom and then used the little hearts that were punched out as the embellishments on the side.
I completed the image sentiment on the inside:
Sorry for the bad pictures.  I seem to be having a bit of trouble with lighting in my craft room...and it's resulting in very dark, grainy pictures...

This card is entered in the following challenges:
    Die Cuttin Divas #77-A Sketch
    Crafting for all Seasons #33-Bright Colors
    Paper Crafting Journey-Anything Goes
    2 Sisters Challenge #103-Anything Goes

Thanks for stopping by!!


12 Fabulous Comments:

Always and Forever!

No new card to show in this post...well maybe a few sneak peaks of what is to come in my etsy store when I open up again on Monday.

This post is to tell you why today is a special day.

Right off, today is Matthew and I's 9th wedding anniversary!!!  9 years!!  I think about that number and wonder if it's right...no way we have been married 9 years..but yet we have been through so much that 9 years makes sense.
Matthew and I met my junior year of high school at a banquet for our Vocational School.  He was the guy that I'd seen around at my church youth group, on sport pamphlets being recognized for setting soccer records, the one that I always hoped to see heading to the bus and would usually be the one who almost knocked me over rushing out the door.

But I'm a shy girl.  All I could do was look, hope, wonder...
That banquet on April 24, 2002 set it all in motion.  We went on our first date the Friday after and I fell head over heels.

Three months after we met, he moved to Seattle, WA for college.  Our relationship was built over a 2500 mile distance for almost 9 months.  It. Was. Not. Easy!  But man, if someone sticks with you for 9 months, only talking on the phone and webcams!....ok let me explain something about that...I had dial-up internet...and not good dial-up either.  So my connection didn't always last and would often cut out on us in our middle-of-the-night conversations.  But we did our best.

It was hard.  I hated it.  He came home for Christmas and that was it till May.  I almost gave in...several times.

But this is what makes Matthew so amazing.  He always knew (and still does) when I needed help, how to make me smile and laugh, how to lift my spirits and make everything right again.  I knew I couldn't let him go.  So when he came home that summer, I married him!
We've had a crazy 9 years.  Moving from Michigan to Washington right after our wedding.  I worked while he finished college and we lived in a tiny apartment with 2 of our darling cats-Storm and Cloud.  We bought a car and a house in the same year.  Made it a home.  And then I pushed him to pursue his dream job at Ubisoft which moved us from Washington to Montreal, QC.
I've moved from one coast to the other with Matthew, and after all the excitement, all the craziness, the change, the adventure, the struggles, he's still the one that makes me feel complete!  And I would do it all over again as long as he is by my side.

I love you Matthew!  Always and Forever!
Happy Anniversary!
<3 Emily

Sneakies:

3 Fabulous Comments:

River Rocker

Happy Tuesday!!!
Today marks the start of a new challenge at Tuesday Throwdown and it's a fun one!  We are challenging you to add a moving element to your card!  Now I must admit...this was not easy for me.  I don't often add moving stuff to my cards...it's never something that crosses my mind when I am sketching out a card..so I struggled with this one.  Until I found this card: Dianes Rambles

Using that card as my inspiration, I tried and tried and tried to get something to work for me.  But none of the elements or cuts I wanted to use would work properly!  I was getting so frustrated.  So finally, I just decided to case Dianes card!
Don't laugh...this is my first rocker card! :)  It was fun to try something new and I do like the motion a rocker card gives without being overwhelming.  I just struggled so bad getting my brain to get creative on this one!  But it turned out cute :)  He's floatin down a river!

Our fabulous sponsor this week is Robyn's Fetish.  They have provided images for our DT to use on our cards.  I have chosen S. S. Hoppity for my image.  I paper pieced his shirt and the canoe, along with all the water waves.

The trees are cut from the Wild Cards cartridge and I added some small punched out flowers to the branches as well as on the fence in the front.
Then just added some blue stickles to the river so it sparkled and it was done! 

Stop by and join in the motion fun at Tuesday Throwdown.  We have just introduced a bunch of new members to our team and several of them are joining us for the first time this week with their fabulous creations!

Thanks for stopping by!

3 Fabulous Comments:

Love Wrapped in Hugs

TGIF!  I hope you are having a wonderful start to your weekend!
My week has been...something...
A little crazy...
Kinda rushed...
Sometimes slow...
And pretty unproductive...

We are kind of in limbo right now...we just got back from a 5 day camping/reunion trip to MI which was so fabulous!  And now we are getting ready to head down to NY to go camping again with my parents!  So it's been a week of not really knowing what to do, not wanting to start anything because we are just leaving again, but really itching to get crafty!

So I got my craft on today.  A few birthday's are coming up on my calendar so I stuck to that theme for my card.
Actually...I almost love this card too much to send it out! :)  Everything about it just pulled right together!  (other than the questionable coloring...struggled a little with that today...)
I decided to go with kraft framing for this card.  I just love pink and brown together so it worked fabulously!

The sweet image is Love Letters from Saturated Canary.  She is so versatile!  And yet, this is my first time coloring her up!  I used a sweet sentiment from Create with TLC that I thought went perfect with the image, but I also wanted to get Happy Birthday on the front, so I typed it up really small and flagged it behind the sentiment.  I added 3 of my handmade heart buttons to the corner for additional embellishment :)

Oh Oh!  And!  Check out the die cuts in the corner and behind my sentiments!  Know what those are??  My fabulous mother-in-law bought me some Memory Box dies for my birthday this past weekend!!!  So! Excited!  This corner die cut (Macarena Corner) out so well with my cuttlebug.  Such clean edges.  Makes me smile :) 

Ok, onto the inside.
Not very  often do I show the completed inside of a card....that's usually because I never seem to do them together...you'd think that would be easy...but I have a bad habit of finishing the front and putting it aside.  Mostly because I'm so excited to move onto the next card that I don't want to think of what to do on the inside :)

But today I finished it.  And today I am showing it to you!  Mostly because I wanted to show off my other Memory Box die (Cherish Border) :)  This one gave me quite a fit in my cuttlebug...the whole outside edge would cut but nothing in the middle would!  What on earth?  Anyone else have that issue?  Or any tips on how to get it to cut completely?  Maybe it was just the kraft cardstock being too thick...and since this is my first time using them I could just need practice...but anyhow...I had to manhandle the silly thing to get it to cut...and even then I had to use my xacto on some parts.

But it's so cool and I love them both so much!  Perfect accents to any card :)

This card is entered in the following challenges:
    Graphicat Sketches #13
    Kaboodle Doodles #130-Birthday or Special Day
    Lia Stampz #22-Birthday
    Paper Pretties #50-2 or More Designer Papers
    Bearly Mine #46-Anything Goes
    Stampavie and More #173-Birthday

Thanks for stopping by and be sure to over and "like" my Facebook fan page!!  I'd so appreciate it :)
<3

3 Fabulous Comments: